|
Steps:
1. Turn the power to your room off and remove any ceiling
fixtures, such as a ceiling fan. Next, determine the
center of the room by popping chalk lines from corner
to corner.
2. Locate the ceiling joists with a studfinder and mark each location by driving a nail into the joist (most of the nail should be exposed). Check the ceiling to make sure it is level at this time.
3. Take measurements and pop a third chalk line (horizontally) across the ceiling to determine the location of the center ceiling joist. This will determine the location of the first furring strip. * Note: Furring strips are attached directly to a ceiling perpendicular to the ceiling joists, onto which ceiling tiles are clipped or stapled.
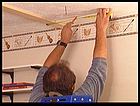
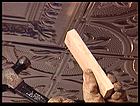
4. Begin by attaching the first 1" x 4" furring strip. Align with the chalk line (note the nails that mark the joists) and drive into place with 2-1/2-inch screws.
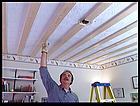
5. Next, measure 12 inches from the head of the furring strip to one side of the room and make a pencil mark. Make several marks along the measurement. Repeat this step every 12 inches--aligning furring strips on the marks and securing them with screws. Do this across the ceiling on both sides of the original furring strip.
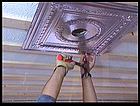
6. You are now ready to begin installing the tin tiles. Start with the center medallion, which will be positioned over the center room light or ceiling fan outlet. Measure to determine the center of the medallion (from corner to corner) and mark it. Use a compass to draw a four-inch circle from the center point. Drill a starter hole, then use tin snips to work from the center out to the circle perimeter. Cut out the hole. There are tin snips designed to make cutting holes easier. Also, be sure to wear leather gloves when handling tin tiles.
7. Position the medallion over the light fixture junction box and nail it to the furring strips. Drive in flathead nails every six inches along the furring strips.
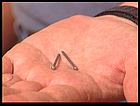
8. Before hanging the tiles, clean them with denatured alcohol and rags. Be sure to remove any protective film that might be applied to the tiles. You'll be nailing the tiles with bead-head decorative nails. They will match the tile and look almost a part of it.
9. Attach the first tile by overlapping the edge of the medallion, aligning the tile along the beads and buttons of the tile edges. Nail bead-head nails along the exposed edges of the tile. Continue around all sides of the medallion--then work outward to all four walls. Continue to overlap and use bead-head nails--using flathead nails to attach the sides. Use tin snips to fit the tiles where appropriate.
10. To seal any overlapping seams that aren't flush, use a small wood block and hammer to "tap" the seam so that it seals. Don't hammer too hard--just enough to close the seam. Continue for each seam until the ceiling looks consistent.
11. Once the ceiling is complete, you are ready for crown molding around the perimeter. You can attach tin molding directly to the wall studs without using a woodstrip or existing crown molding.
12. Now that the ceiling has taken shape, you can apply a clear polyurethane coat to the entire tin surface. You may also prefer to paint the surface, although the tin appearance does look fabulous with polyurethane alone. Of course, you will want to reattach the light fixture or ceiling fan as a final step.
13. This project costs around 700 dollars and takes two to three days to accomplish.
|
|